INSTRUCTIONS for sending the ESF to the state body to receive state support measures

In the IS ESF in the journal "Electronic invoices" the possibility to send ESF to information systems of state bodies is realized. Sending an invoice can be initiated by both the taxpayer-supplier and the taxpayer-recipient. The selected ESFS will be sent for confirmation/rejection to the counterparty. The ESF and the associated SNTS will be blocked by the ESF IS after the initiation of sending. Confirmation of sending the ESF to the system of state bodies is not required from the employees of the OGD. After confirmation by the counterparty, the ESF will be sent to the selected state body. If the counterparty rejects the sending of documents to the IS GO, the ESF and the associated SNTS will be unblocked.
For sending, the ESFS are available in the statuses "Not viewed", "Delivered". If the ESF was issued on the basis of the SNT, the status of the associated SNT must be "Confirmed". When selecting the main/corrected/additional ESF, the entire chain of existing invoices associated with it will be sent to the information system of the state body.
An electronic invoice that was previously sent to the IS of the state implementing state support measures may be sent to the IS of another state body implementing state support measures if the subsidy payment was not previously received.
Up-to-date information on the sent requests for sending can be tracked in the log of sending the ESF to the IS GO. The transition to this journal is carried out from the journal "Electronic invoices".
Initiation of sending the ESF to the information system of the state body
1. To send electronic invoices to the information system of the state body, it is necessary to select one or more ESFS in the statuses "Not viewed", "Delivered". The initiator of sending can be both the supplier and the recipient. In the case of the selection of ESFS that were issued on the basis of the SNT, the status of the associated SNTS must be "Confirmed". After the ESF has been selected, the "Send ESF to GO" button will be available to click.
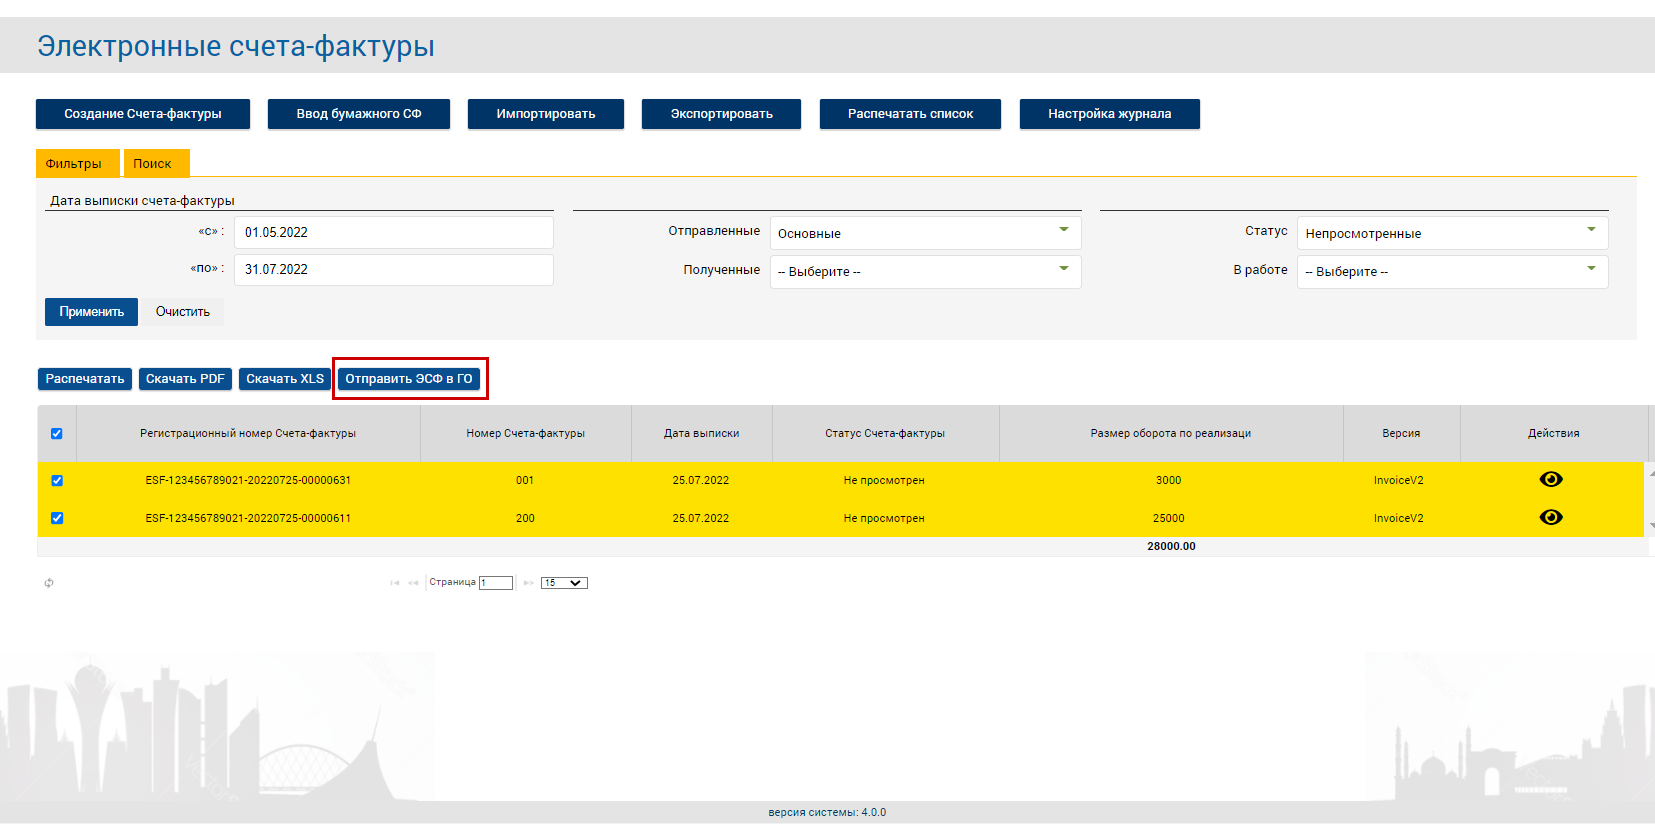
Figure 1 – Sending ESF to IS GO
2. After clicking on the submit button, a dialog box will open for the final selection and confirmation of sending invoices. In this window, you need to select a government agency and, if this state has a subsidy, select a subsidy from the directory. After the ESF and the state body are selected, click on the "Send" button. The selected ESF and associated SNTS will switch to the status "Blocked IS ESF" and they cannot be revoked, an additional/corrected ESF/SNT will be issued.
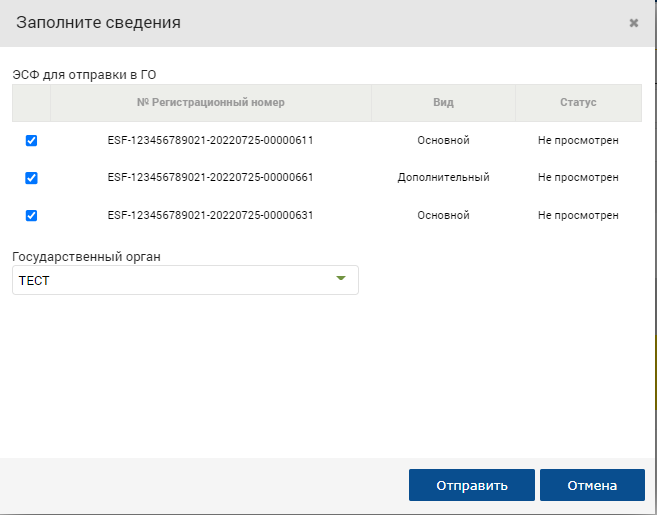
Figure 2 – filling in the request details
3. Next, the action must be signed with an electronic digital signature. Click the "Sign" button, after which a window for selecting a certificate will be displayed. You should select the signature certificate. Then enter the PIN code and click the "Sign" button. The request has been sent to the counterparty for approval. ESF and associated SNTS are blocked.
Confirmation by the counterparty of sending the ESF to the information system of the state body
After the initiator taxpayer has formed a request, it will be sent to the second party for confirmation or rejection.
1. When logging into the ESF IP system, the counterparty pops up a notification with a request to confirm or reject the sending of the listed ESF to the state body. You can view the ESF by clicking on the registration number of the SF. Clicking opens a tab in the browser to view the ESF data.
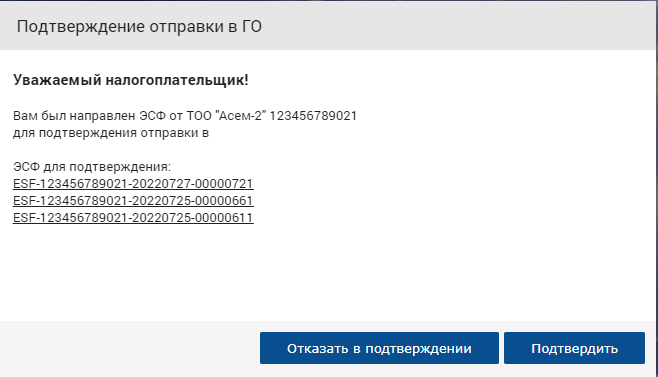
Figure 3 – notification of the need to confirm/reject
2. To confirm, click on the "Confirm" button, then a warning will pop up that the ESF will be blocked, click "Close". The selected ESF and associated SNTS are in the status "Blocked IS ESF" and they cannot be revoked, an additional/corrected ESF/SNT can be issued.
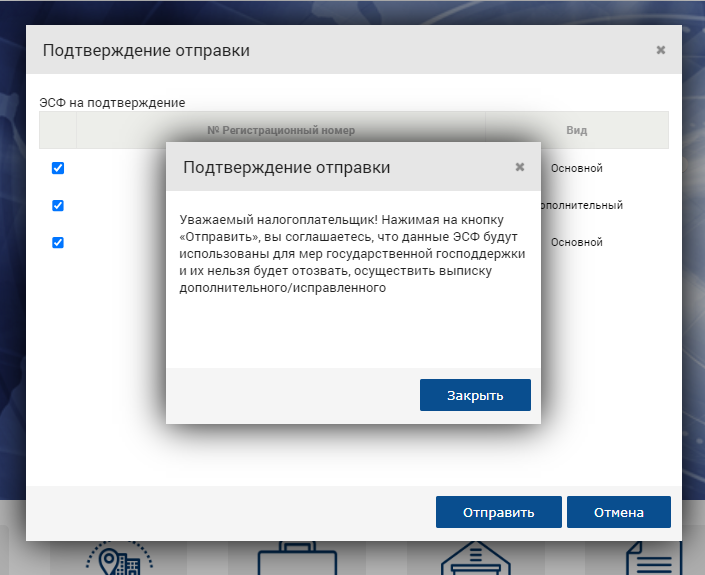
Figure 4 – confirmation of sending
3. Next, click on the "Send" button and sign the action with an electronic digital signature. Click the "Sign" button, after which a window for selecting a certificate will be displayed. You should select the signature certificate. Then enter the PIN code and click the "Sign" button. ESF sent to IS GO. Confirmation from the OGD employee is not required.
Rejection of sending to the information system of the state body
After the taxpayer initiator has formed a request, it will be sent to the second party for confirmation or rejection.
1. When logging into the ESF IP system, the counterparty pops up a notification with a request to confirm or reject the sending of the listed ESF to the state body. You can view the ESF by clicking on the registration number of the SF. Clicking opens a tab in the browser to view the ESF data.
Figure 5 – notification of the need to confirm/reject the request
2. In order to reject the request to send the ESF data to the IS GO, click "Refuse confirmation". After clicking, a window will open where you need to write the reason for the rejection. Next, click on the "Send" button and sign the action with an electronic digital signature. Click the "Sign" button, after which a window for selecting a certificate will be displayed. You should select the signature certificate. Then enter the PIN code and click the "Sign" button. The request will not be sent to IS GO. The status of the ASF and related SNTS will change and the status that the ESF had will be assigned/SNT before initiation of sending to IS GO.
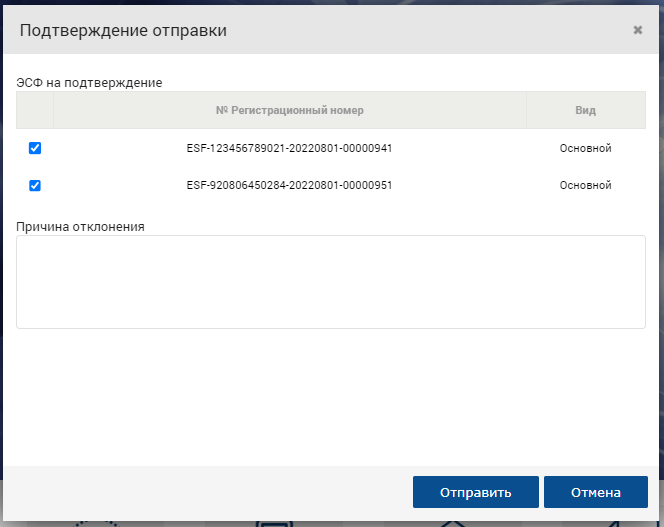
Figure 6 – reason for rejection
Working with the log of sending ESF to IS GO
The log of sending the ESF to the IS GO provides users with the opportunity to view information about sent or received requests, to which state they were sent, to track the status of the request, the history of the request, the date of the request and confirmation.
1. The information about the request can be viewed by opening the request log of the IP. You can go to it in the menu from the magazine "Electronic invoices".
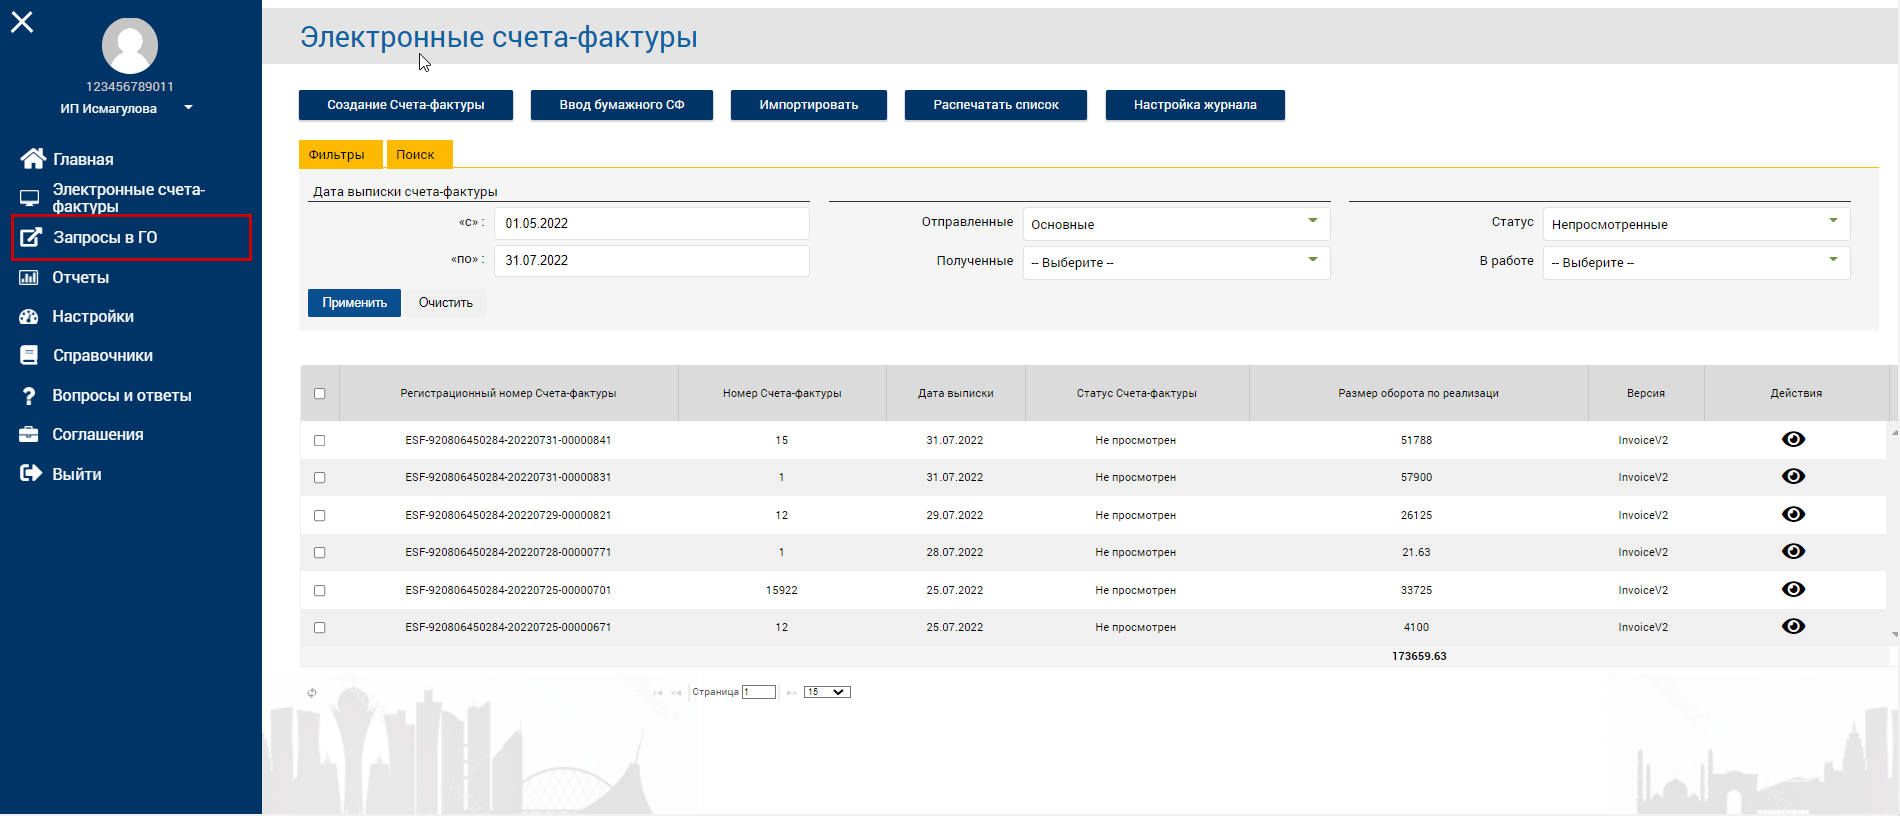
Figure 7 – the button to go to the request log of the
2. After clicking, the log of requests will open. In this log, you can view information about sent requests or received requests, in which order they were sent, track the status of the request, the history of the request, the date of the request and confirmation.
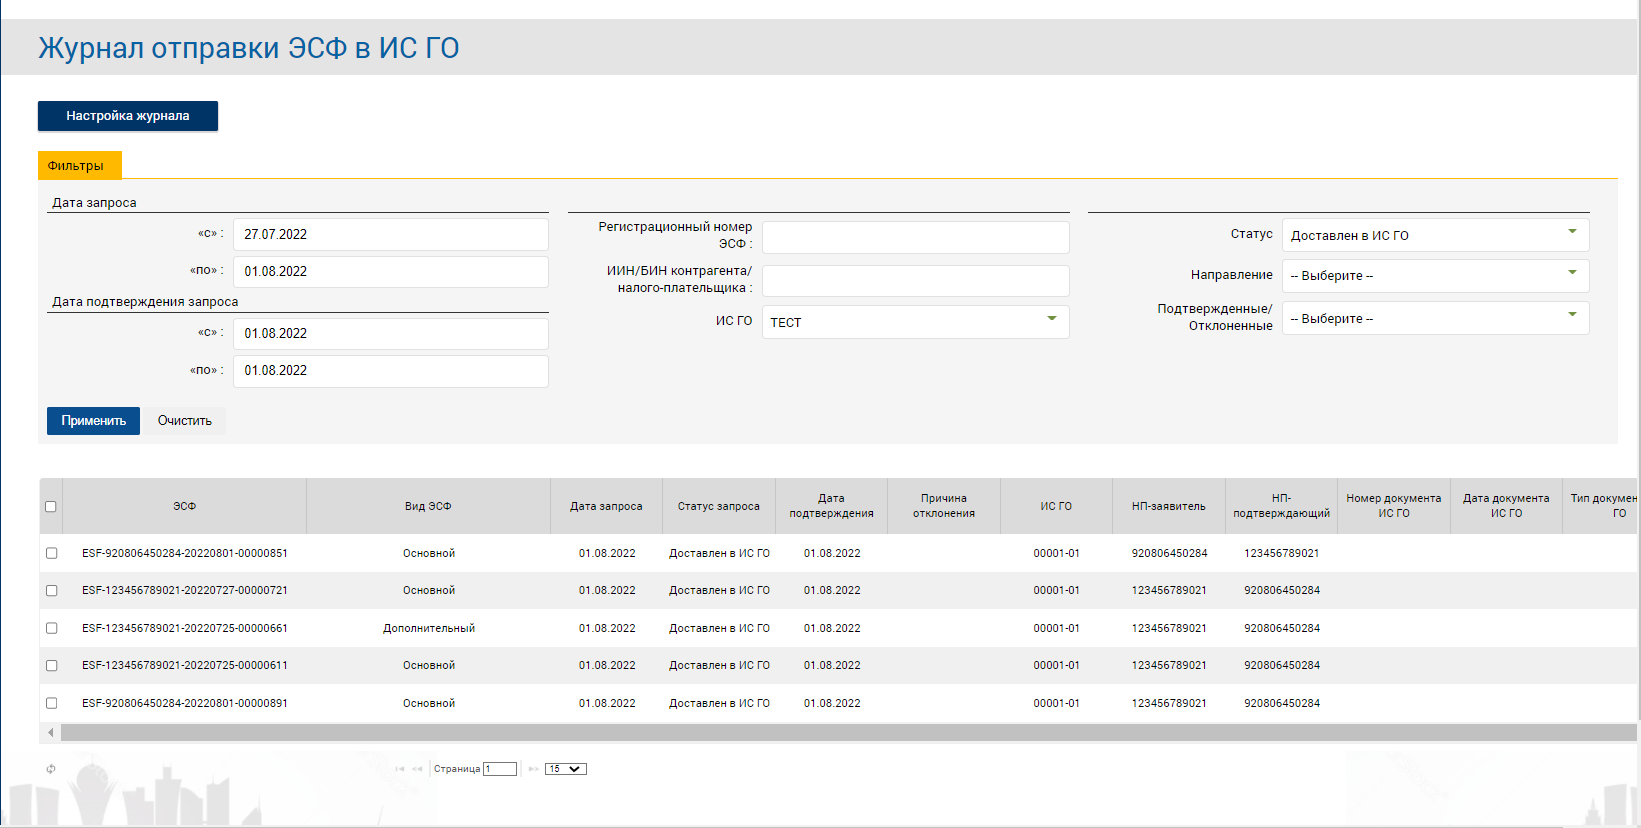
Figure 8 – the log of sending the ESF to the IS GO
Request statuses and their description:
- "Sent for confirmation" - the request to send the ESF is awaiting the counterparty's approval, the request has not yet been sent to the GO;
- "Rejected by the confirming NP" - the request to send the ESF was rejected by the counterparty, the reason is specified by the counterparty;
- "Approved by the confirming NP" - the request to send the ESF has been confirmed, the request will be sent to the IS GO;
- "Sent to the SHEP" - the ESF were sent and accepted by the SHEP;
- "Not accepted by the SHEP" - ESFS were sent, but not accepted by the SHEP;
- "Delivered to IS GO" - ESFS were delivered to IS GO and accepted for consideration;
- "ESF is included in the application" - The ESF sent to the IC was accepted and included in the application. The ESF will remain in the status of "Blocked IS ESF";
- "ESF is not included in the application" - the ESF sent to the IS was accepted, but not included in the application. The status of the ESF and related SNTS will change and the status that the ESF had will be assigned/SNT before initiation of sending to IS GO;
- "State support measures were refused" - Payment was not made for the sent ESF. The state body sends the reason for the refusal. The status of the ESF and related SNTS will change and the status that the ESF had will be assigned/SNT before initiation of sending to IS GO;
- "A budget subsidy has been paid" - a budget subsidy has been paid for the directed ESF. ESF and associated SNTS will remain in the status of "Blocked IS ESF";
For each request, you can view the history and the reason for rejection. Select the ESF in the log of sending the ESF to the IS GO and click on the "View history" button.
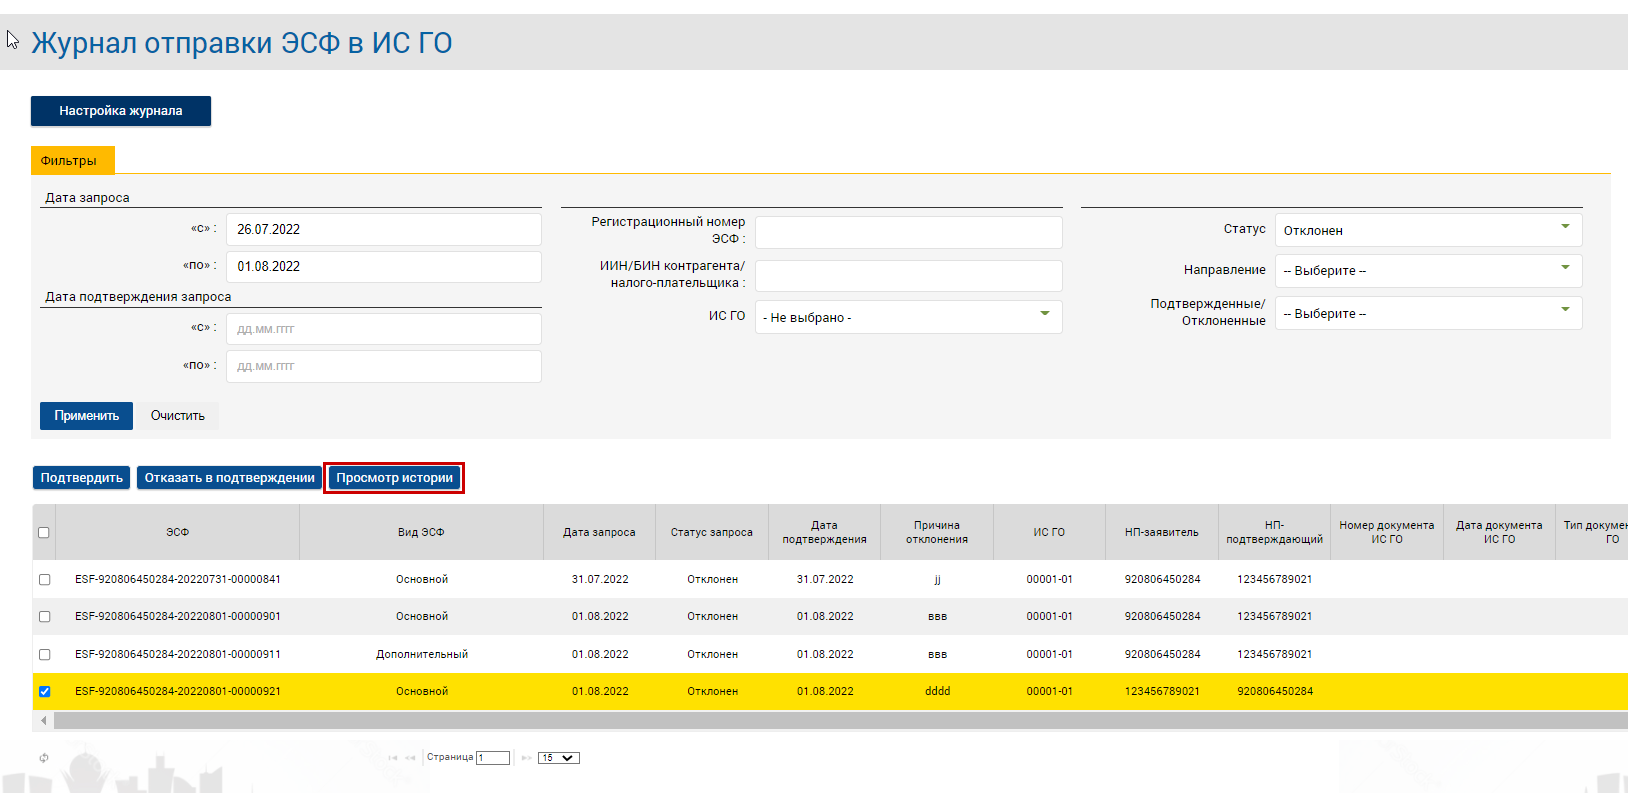
Figure 9 – Request history view button
A review of the request lifecycle history opens, and the reason for rejection by the counterparty is displayed in the note field.
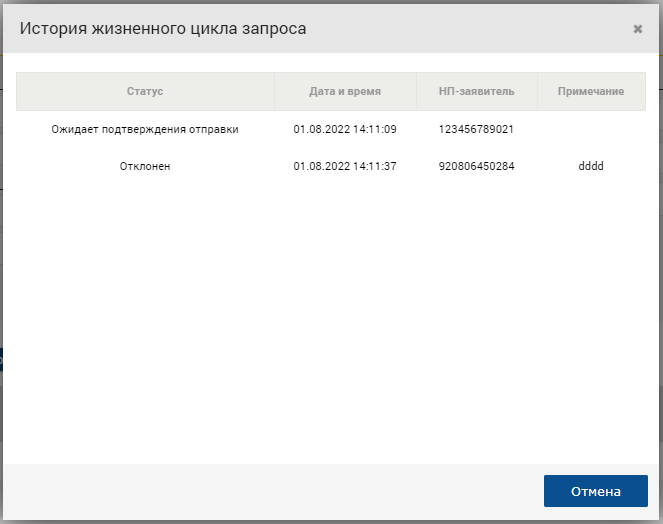
Figure 10 – Request lifecycle history