Extension of EDS online for individuals
Electronic digital signature, abbreviated as EDS, fulfilling the function of your electronic signature when you receive various online services (from obtaining certificates to participation in public procurement) contains confidential information about its owner. Therefore, for security reasons, the EDS must be renewed every year. Thus, you confirm that the certificates are not lost and are in your possession, and not in the hands of unauthorized persons.
Notifications on the expiration of the EDS
RK NCC registration certificates issued for a file system is valid for 1 year. RK NCC registration certificates issued for key information carriers (ID card, Kaztoken, eToken, аKey, jaCarta) are valid for 3 years. The system of the National Certifying Center of the Republic of Kazakhstan implemented the automatic sending of two types of notifications on the upcoming expiration of the EDS with a proposal to extend it online.
- Multiple email notifications – 1 month before, 2 weeks before, 7 days before. To receive these notifications, you must specify your e-mail in the personal account in the NCC RK.
- SMS notification 10 days before the date of expiry of the EDS. SMS comes to the phone number registered in the Mobile Citizens Database, i.e. to the one that is attached to the user in the eGov Personal Account.
How individuals can extend DS`s validity by themselves?
On the homepage at NCA website, you need to go to “Personal Account” section, then sign in to your Personal Account. (Fig. 1).
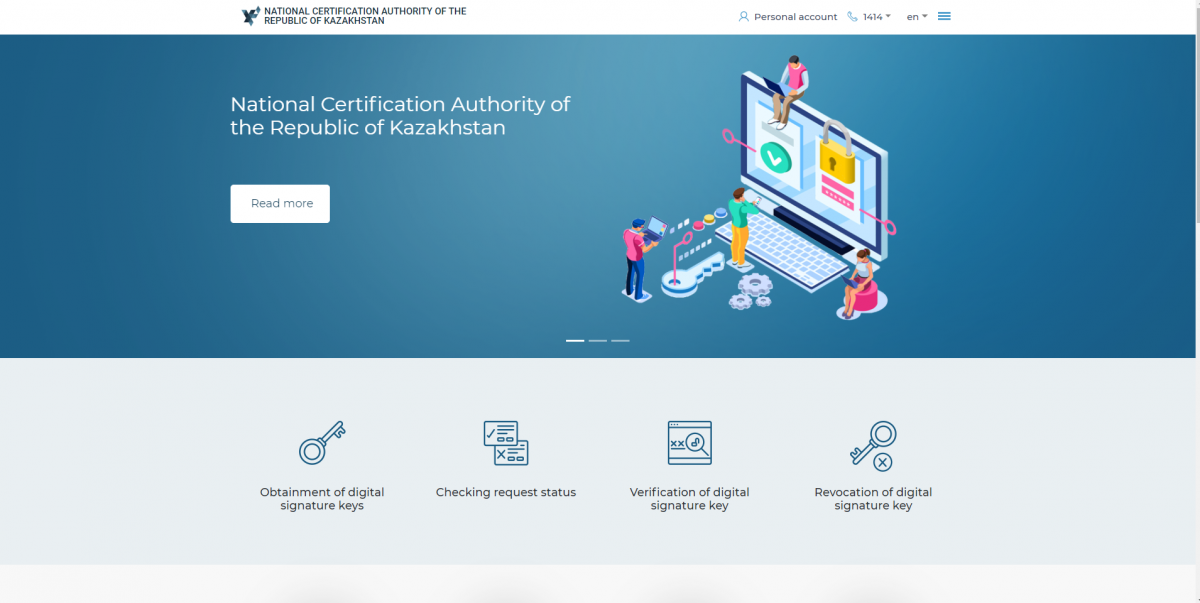
Fig. 1
Sign in to your Personal Account. (Fig. 2).
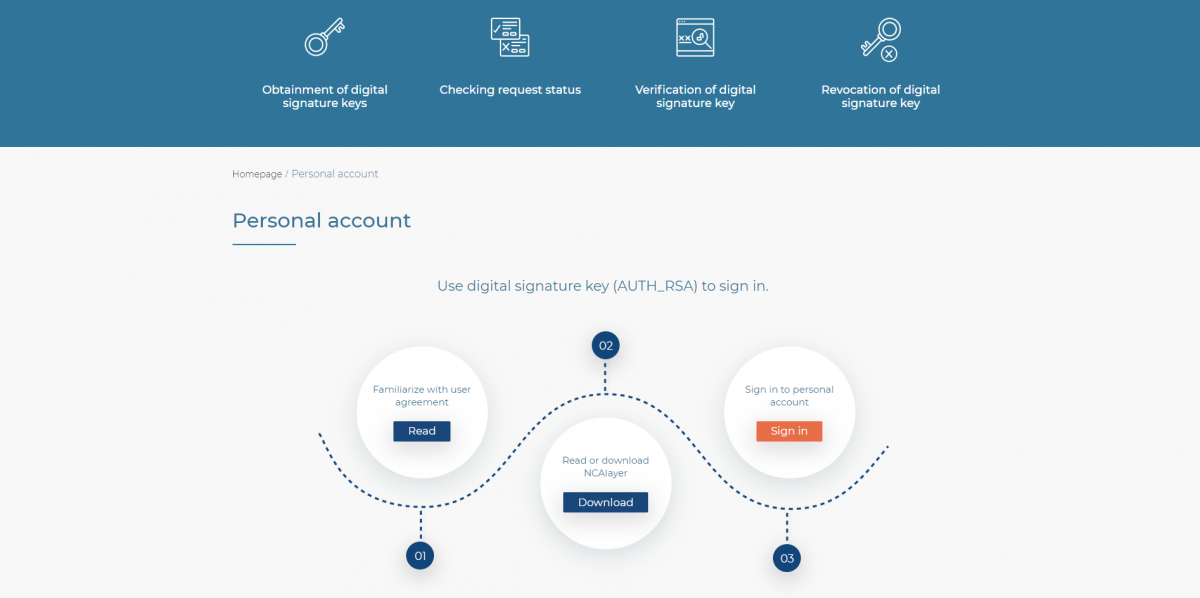
Fig. 2
In the window opened, you should select the “Keys Repository” from the list containing: Personal Computer, ID card, eToken PRO (Java, 72K), JaCarta, Kaztoken, AKey. (Fig. 3).
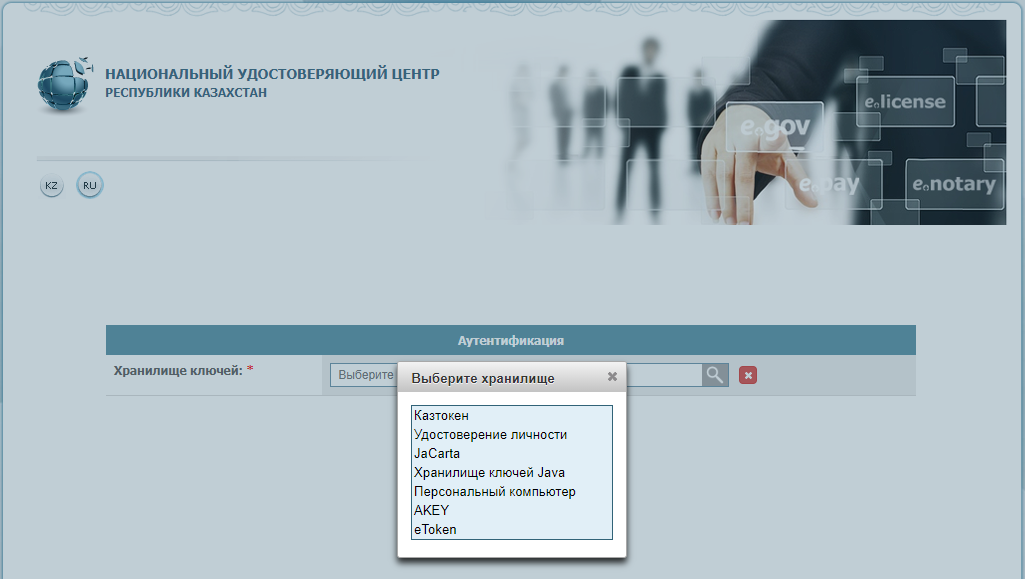
Fig. 3
In the “Path to keys repository” field, you need to indicate the path to where your certificates are contained. Select the authentication key (AUTH_RSA) and press the “Open” button. (Fig. 4).
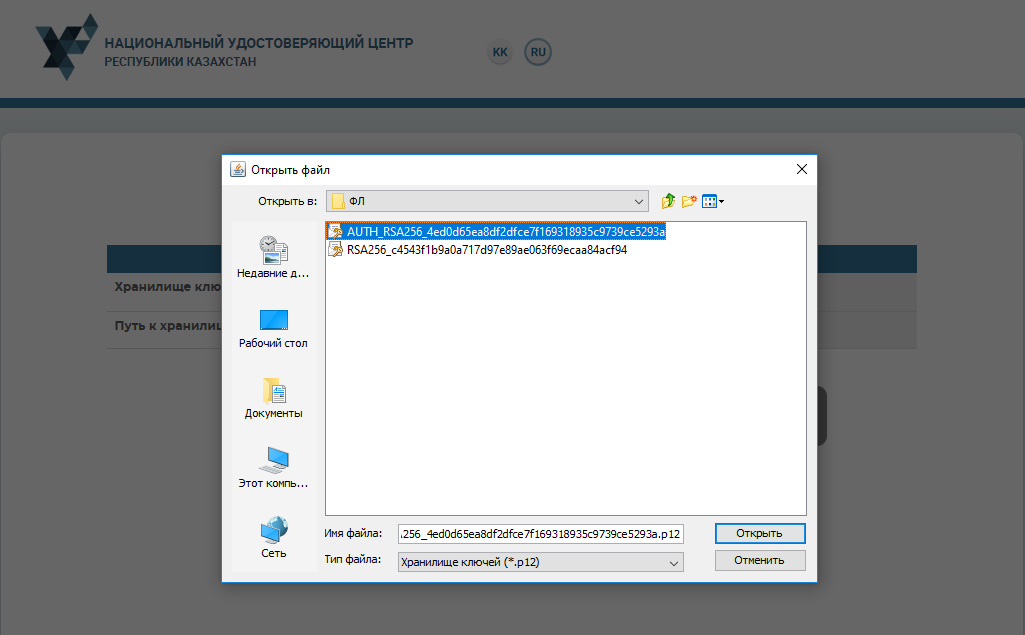
Fig. 4
Press the “Enter” button. (Fig. 5).
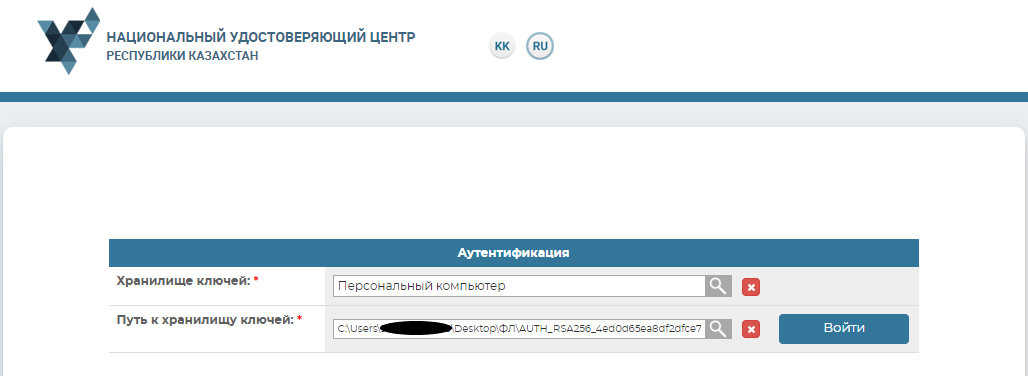
Fig. 5
In the emerging dialogue window, enter your password for keys repository. (Fig. 6).
NB: The default password for Kaztoken: 12345678, eToken PRO (Java, 72K), JaCarta, AKey: 1234567890.
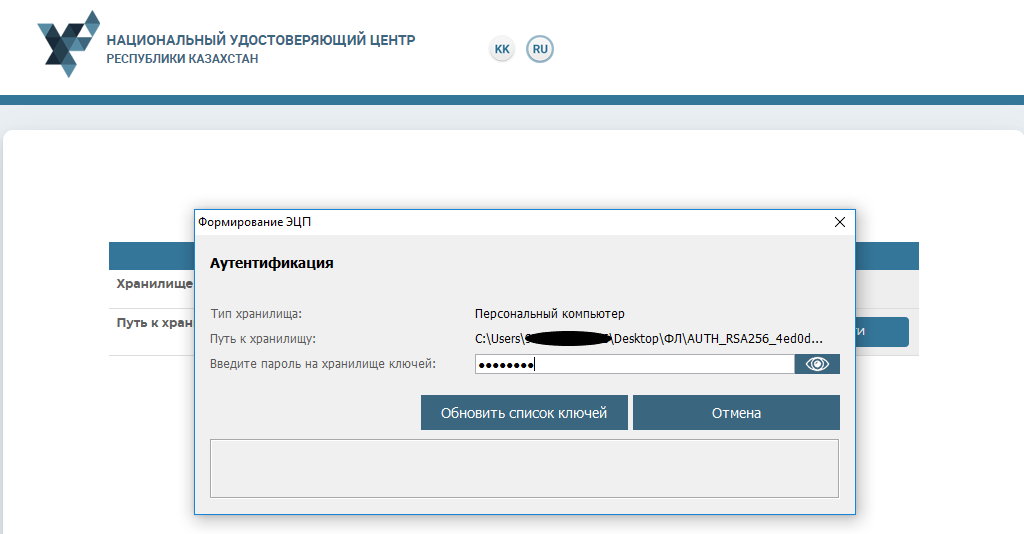
Fig. 6
Press the “Update the list of keys” button. If the password is correct, then the authentication key will be displayed. Press the “Sign” button. (Fig. 7).
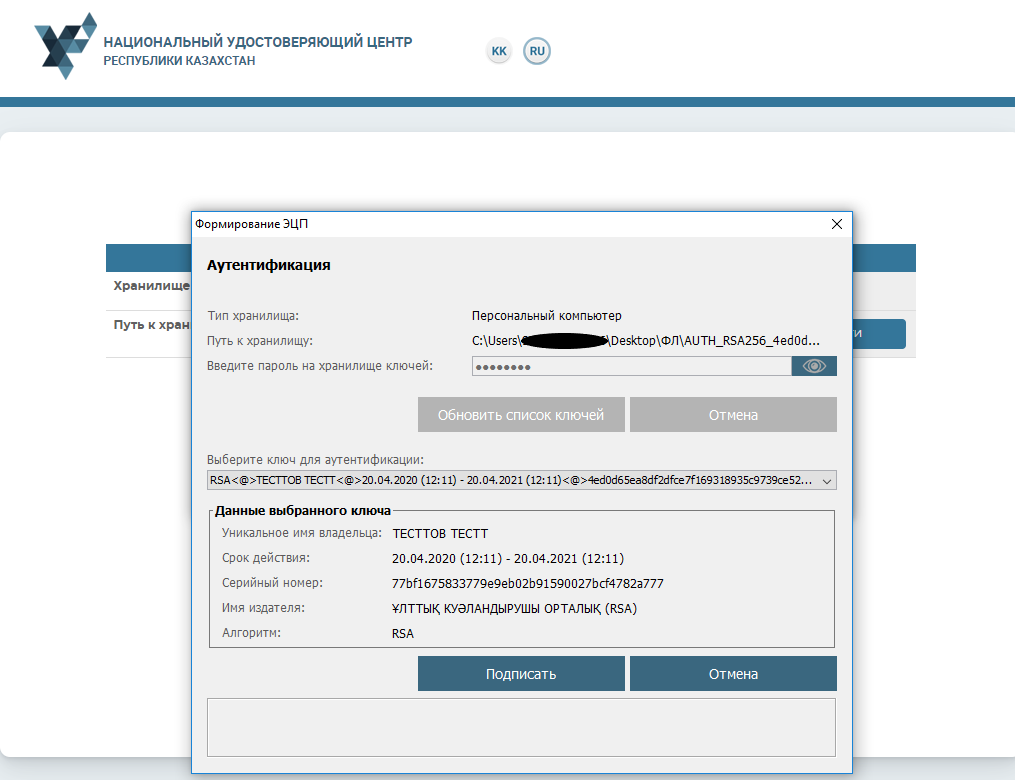
Fig. 7
Welcome to user Personal Account. (Fig. 8).
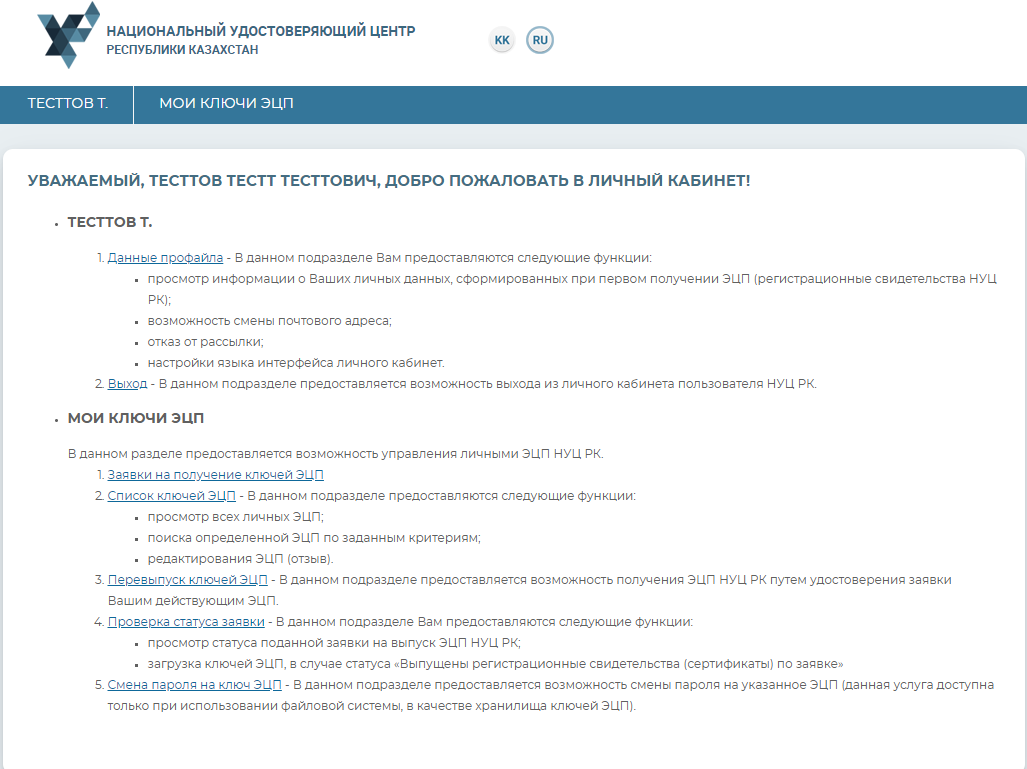
Fig. 8
User’s “Family Name” menu contains information on NCA user profile. (Fig. 9).
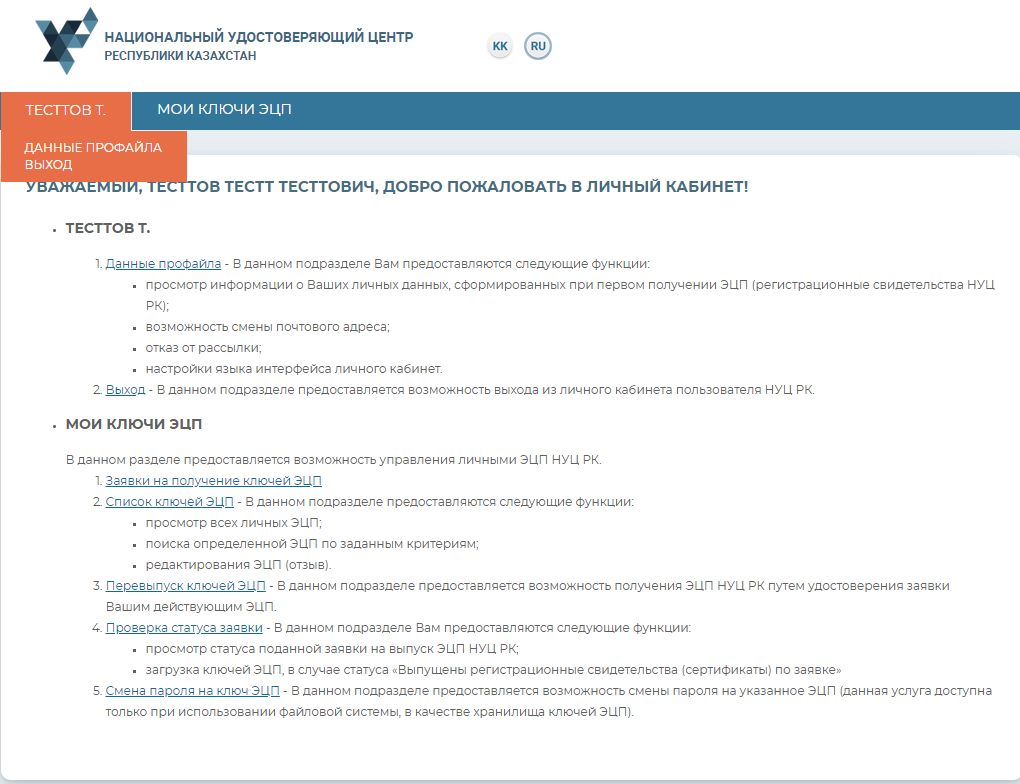
Fig. 9
The profile data contains user’s personal information. In the settings, you may select the interface language, as well as cancel the receipt of notifications to your email. (Fig. 10).
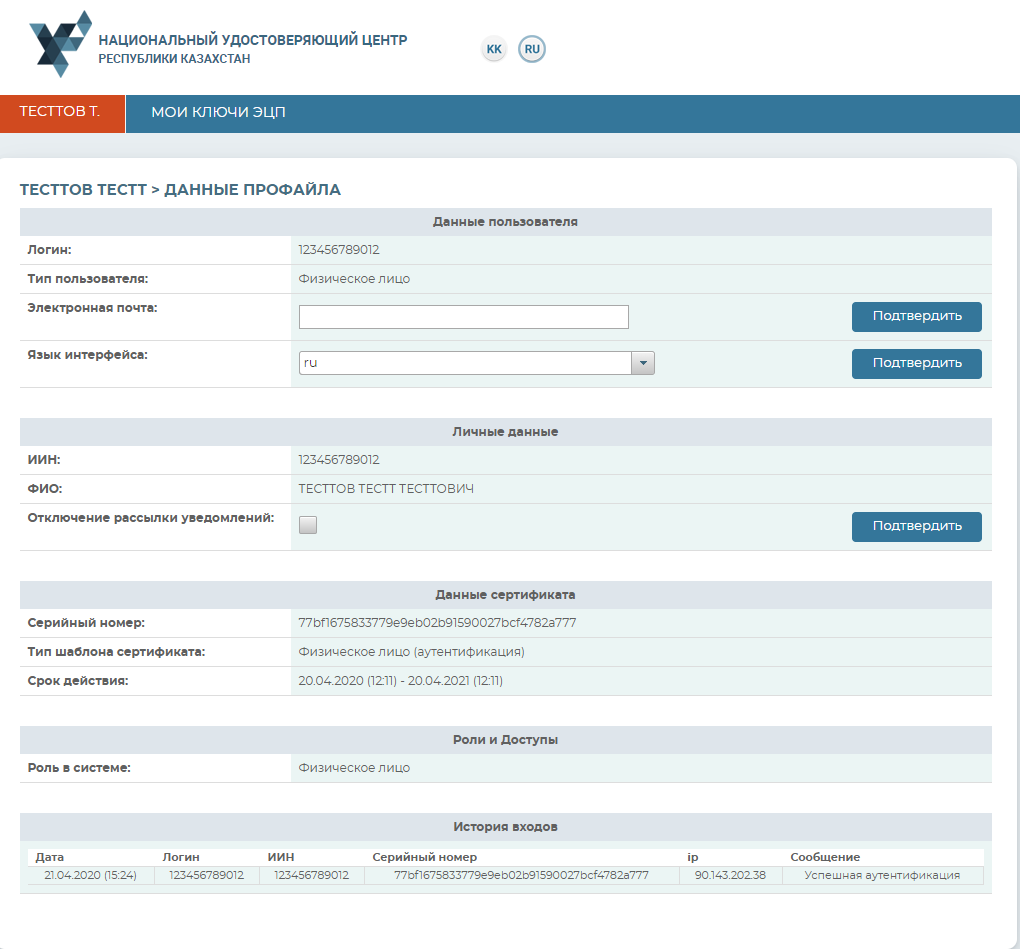
Fig. 10
To work with digital signature keys, go to the “My digital signature keys” tab. (Fig. 11).
In the drop-down menu, select one of the below subsections:
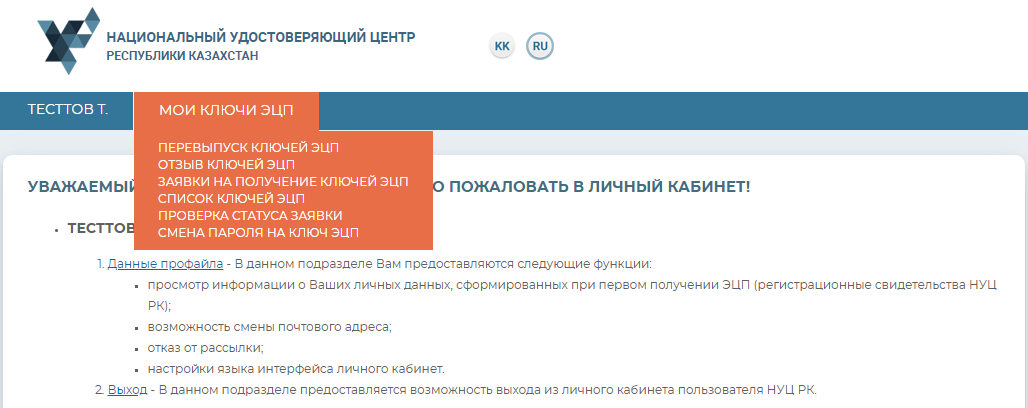
Fig. 11
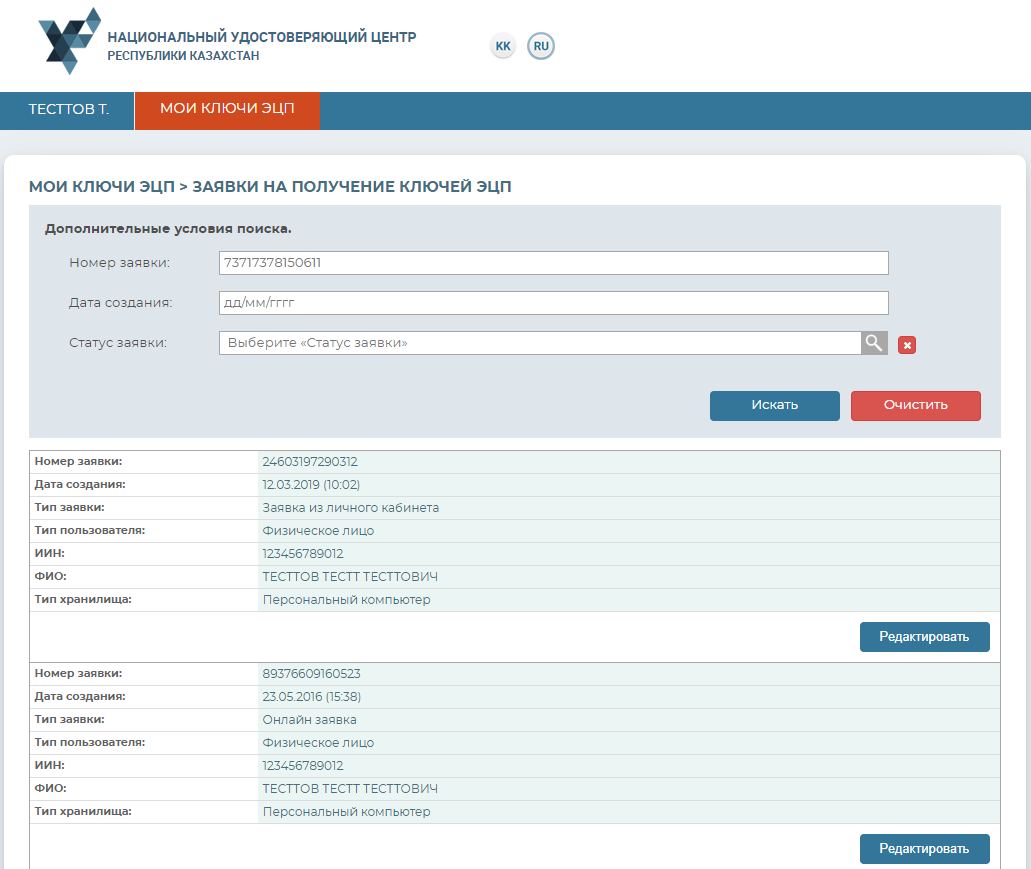
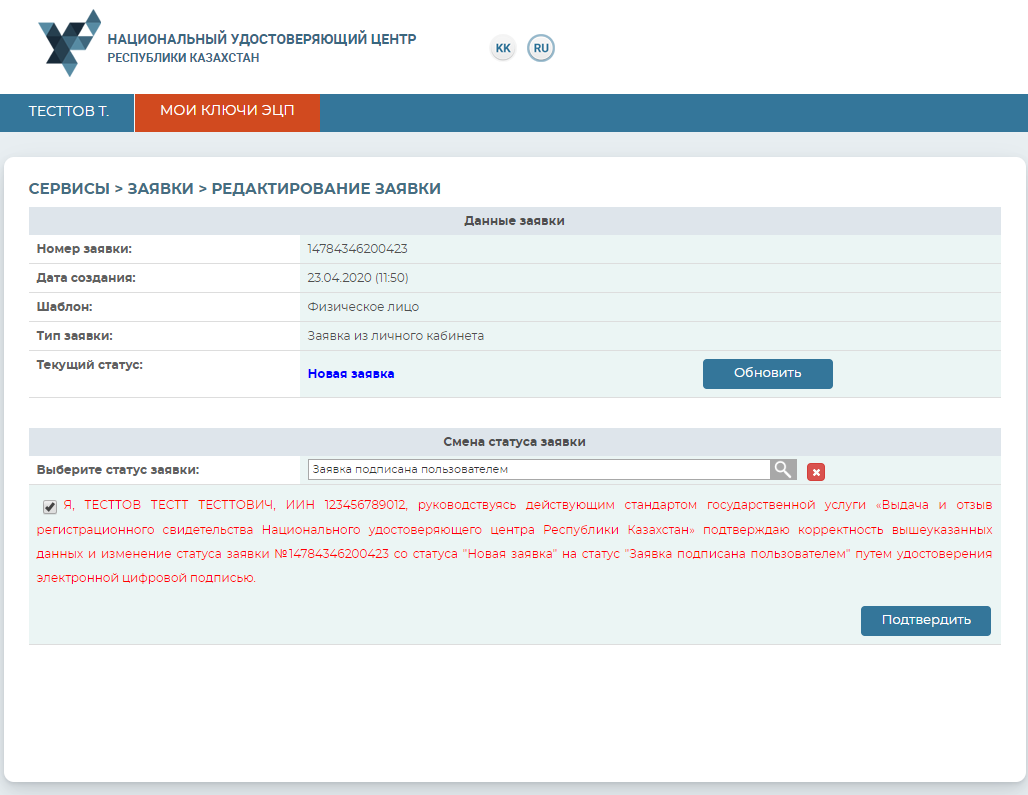
In the event that you have submitted the application via pki.gov.kz in the “Services” section (which section is not a Personal Account’s functionality), you may confirm this application without applying to Registration Authority.
To do so, find the required application and press the “Edit” button.
In the window opened, select the application status.
Tick the box stating your consent to changing the application status and press the “Confirm” button. (Fig. 13).
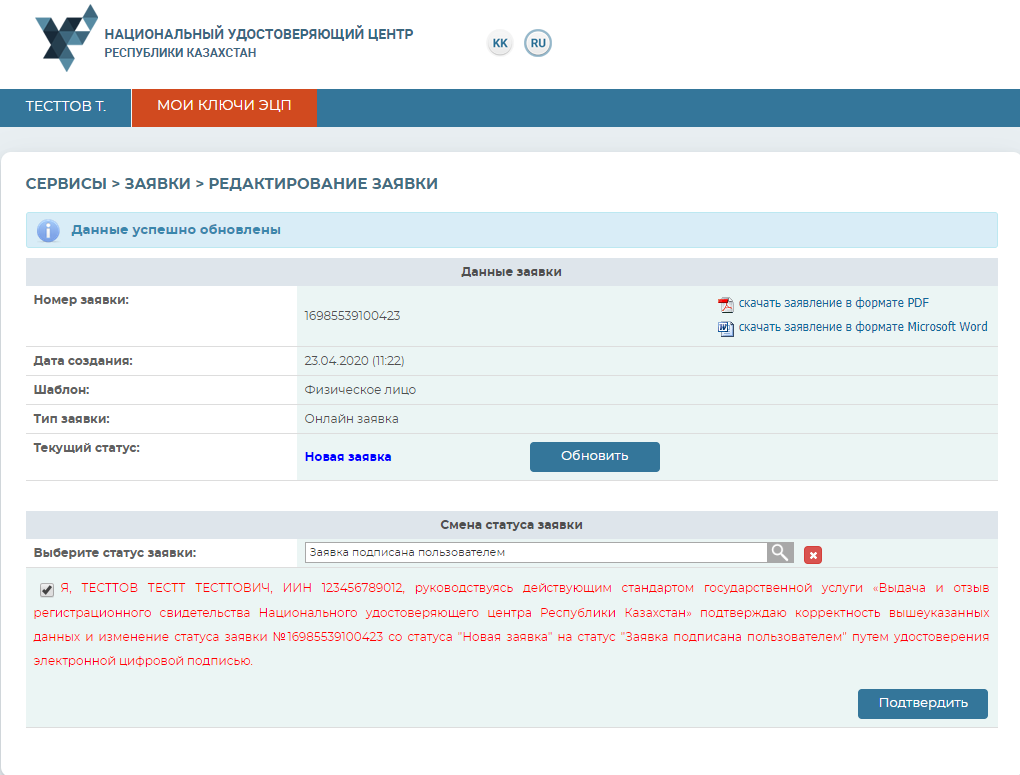
Fig. 13
The application validation procedure is completed.
Upon confirming the application, open the “My digital signature keys” menu, and go to “Checking the application status” section.
Enter the application number and press the “Search” button. (Fig. 14).
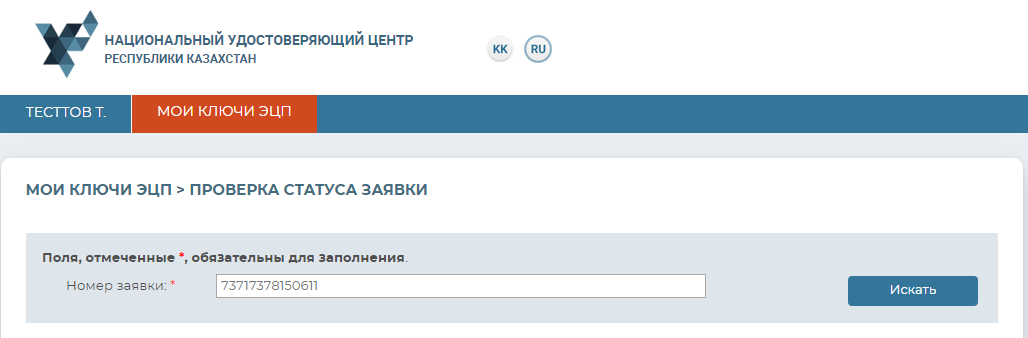
Fig. 14
To set up the certificates, please indicate the folder where your private keys were stored and press the search icon. Indicate the storage place of your private keys generated at the time you submitted the application and press the “Open” button. (Fig. 15).
NB! In the event that in setting up the certificates, the keys were generated to one of the supported secure media: eToken 72K, JaCarta, Kaztoken, AKey, you should connect the device to the PC.
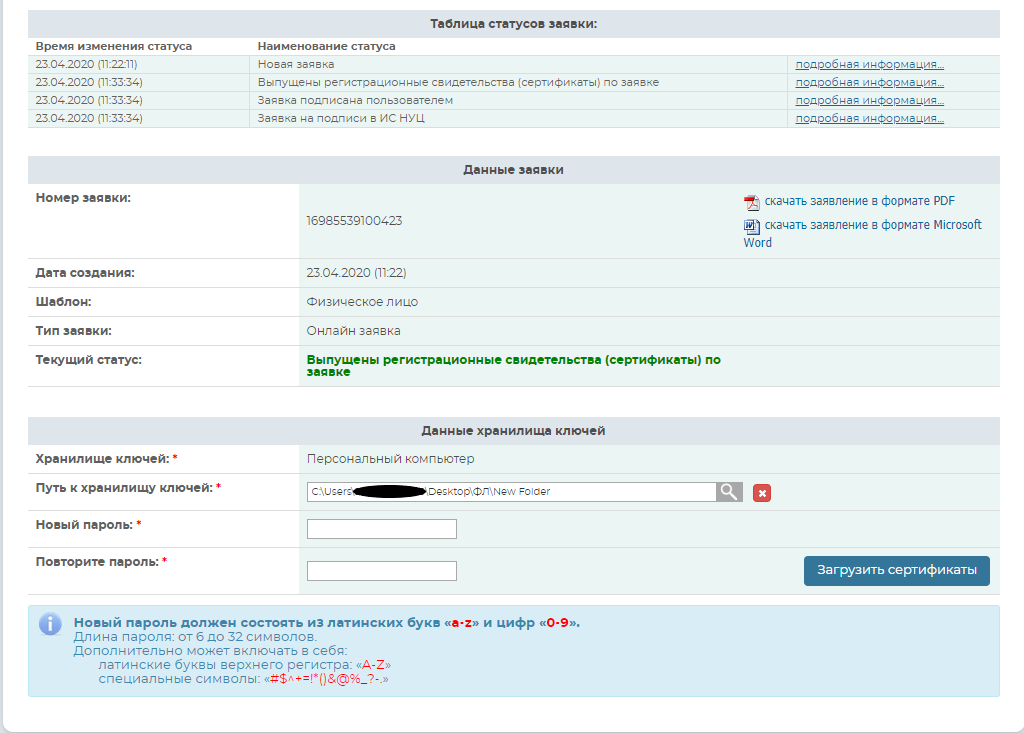
Fig. 15
If you use the PC as keys repository, the fields for password will appear. Invent and enter your password for digital signature keys and press the “Upload certificates” button. (Fig. 16).
NB! Password must contain Latin characters and digits. The password length should be 6 to 32 characters. In addition, password may include: Latin upper-case letters and wildcard characters «#$^+=!*()@%&_?-.».
You MUST remember the password you indicated! The password shall NOT be recovered! NCA shall not keep your password, and if you lose your password, these digital signature keys must be revoked.
Press the “Upload certificates” button. The window will appear informing of the successful setting of the certificates. (Fig. 16).
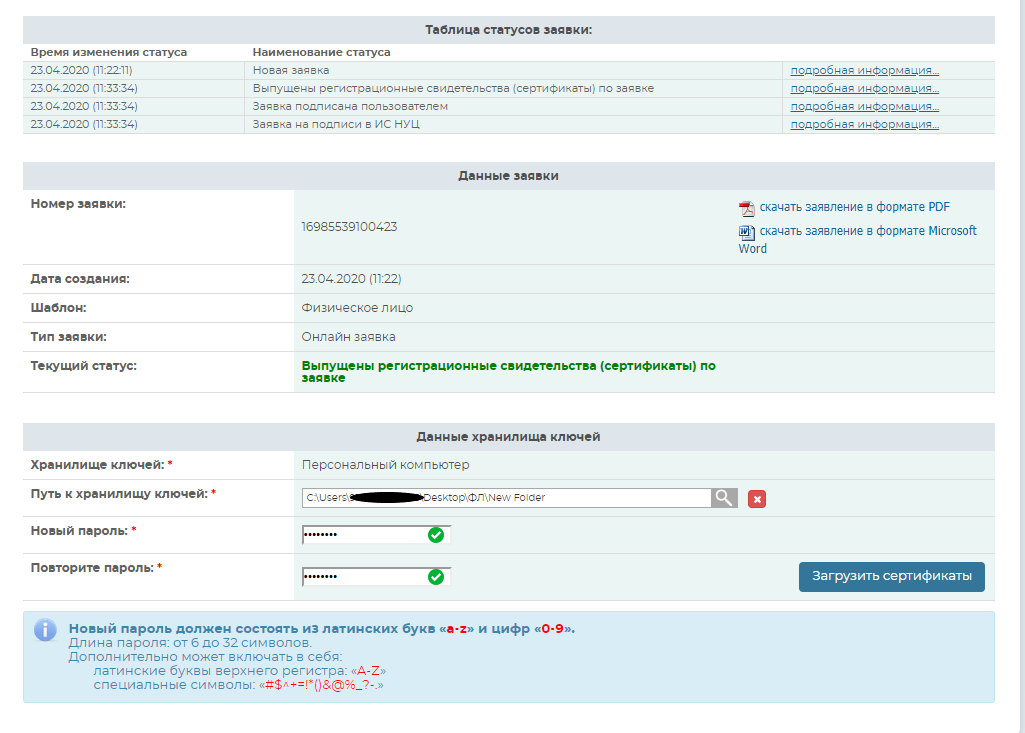
Fig. 16
Certificates have been set up. (Fig. 17).
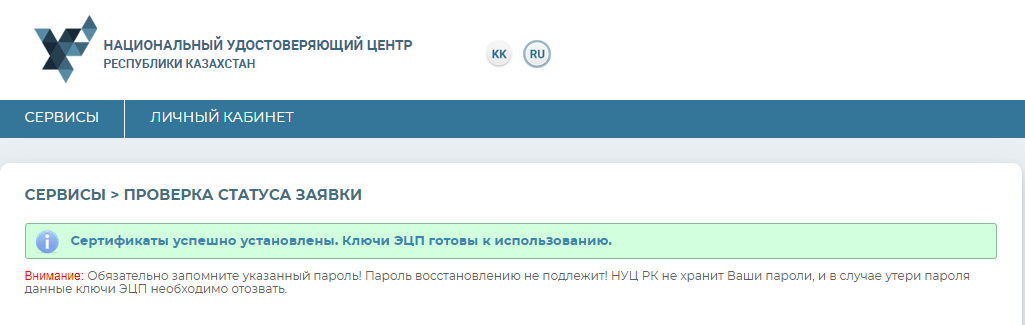
Fig. 17
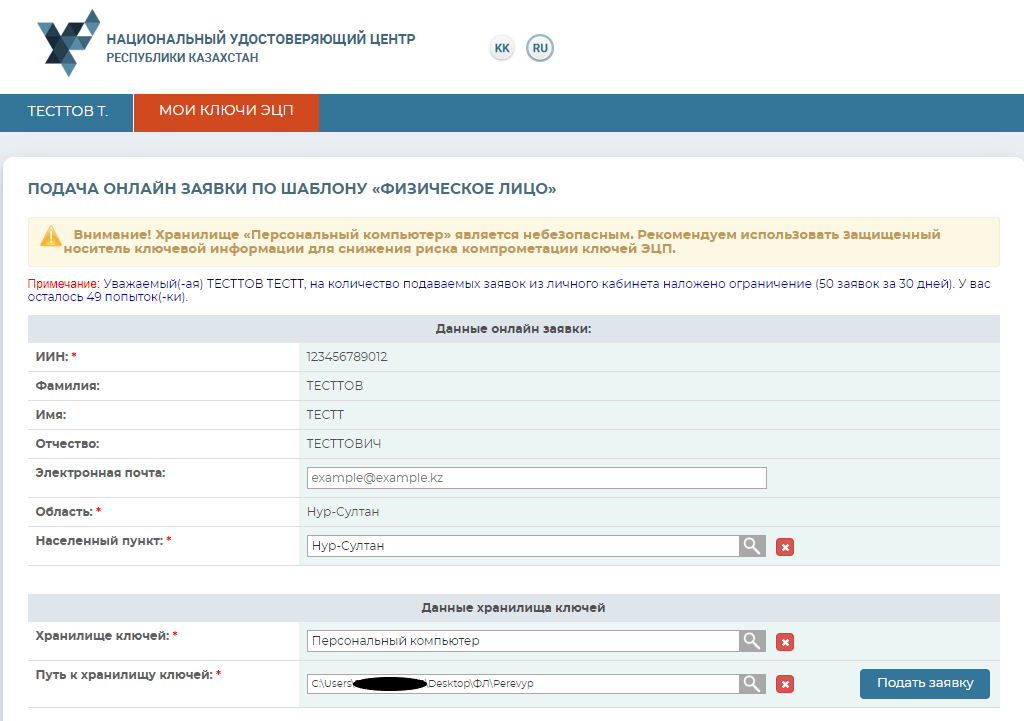
In this section, you may submit your application online (subject to availability of effective digital signature keys), with no need to validate the application in Registration Authority. (Fig. 18).

Remember the application number.
Using this number, install the certificates via the “Status of application submitted” section. (Fig. 21)

Fig. 21
Renewal of digital signature keys has been successfully completed.